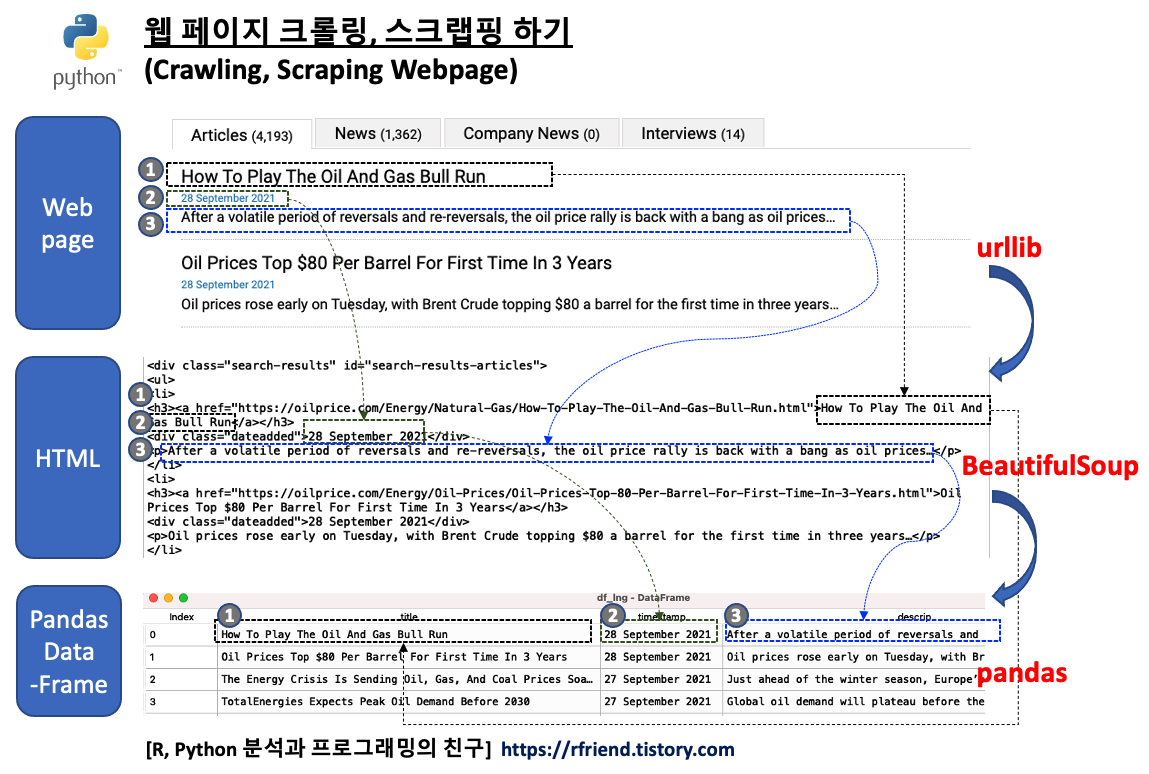
이번 포스팅에서는 Python을 사용해서 웹사이트에서 압축파일을 다운로드해서 압축을 해제하고 데이터셋을 합치는 방법을 소개하겠습니다.
세부 절차 및 이용한 Python 모듈과 메소드는 아래와 같습니다.
(1) os 모듈로 다운로드한 파일을 저장할 디렉토리가 없을 경우 새로운 디렉토리 생성하기
(2) urllib.request.urlopen() 메소드로 웹사이트를 열기
(3) tarfile.open().extractall() 메소드로 압축 파일을 열고, 모든 멤버들을 압축해제하기
(4) pandas.read_csv() 메소드로 파일을 읽어서 DataFrame으로 만들기
(5) pandas.concat() 메소드로 모든 DataFrame을 하나의 DataFrame으로 합치기
(6) pandas.to_csv() 메소드로 합쳐진 csv 파일을 내보내기
먼저, 위의 6개 절차를 download_and_merge_csv() 라는 이름의 사용자 정의함수로 정의해보겠습니다.
import os
import glob
import pandas as pd
import tarfile
import urllib.request

## downloads a zipped tar file (.tar.gz) that contains several CSV files,
## from a public website.
def download_and_merge_csv(url: str, down_dir: str, output_csv: str):
    """
    - url: url address from which you want to download a compressed file
    - down_dir: directory to which you want to download a compressed file
    - output_csv: a file name of a exported DataFrame using pd.to_csv() method
    """

    # if down_dir does not exists, then create a new directory
    down_dir = 'downloaded_data'
    if os.path.isdir(down_dir):
        pass
    else:
        os.mkdir(down_dir)

    # Open for reading with gzip compression.
    # Extract all members from the archive to the current working directory or directory path.
    with urllib.request.urlopen(url) as res:
        tarfile.open(fileobj=res, mode="r|gz").extractall(down_dir)

    # concatenate all extracted csv files
    df = pd.concat(
        [pd.read_csv(csv_file, header=None)
         for csv_file in glob.glob(os.path.join(down_dir, '*.csv'))])

    # export a DataFrame to a csv file
    df.to_csv(output_csv, index=False, header=False)
참고로, tarfile.open(fileobj, mode="r") 에서 4개의 mode 를 지원합니다.
tarfile(mode) 옵션
-. mode="r": 존재하는 데이터 보관소로부터 읽기 (read)
-. mode="a": 존재하는 파일에 데이터를 덧붙이기 (append)
-. mode="w": 존재하는 파일을 덮어쓰기해서 새로운 파일 만들기 (write, create a new file overwriting an existing one)
-. mode="x": 기존 파일이 존재하지 않을 경우에만 새로운 파일을 만들기 (create a new file only if it does not already exist)
* for more information on tarfile module: https://docs.python.org/3/library/tarfile.html
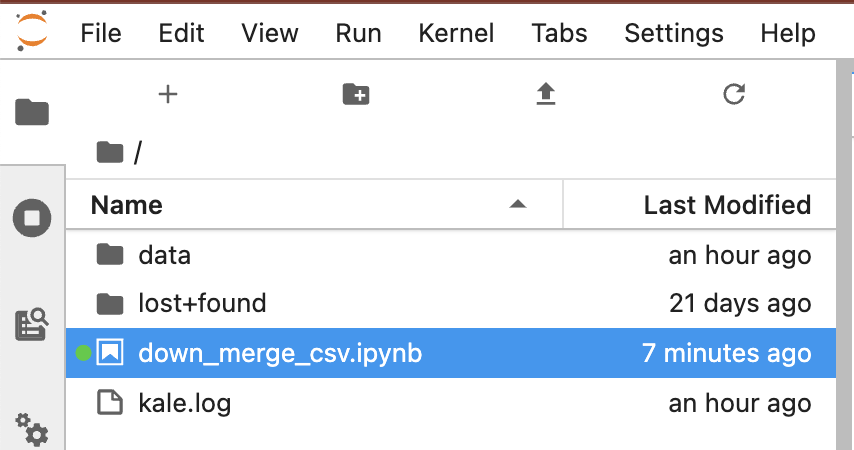
현재 Jupyter Notebook 커널의 디렉토리에는 아래처럼 아직 다운로드한 파일이 없습니다.
jovyan@kubecon-tutorial-0:~$ pwd
/home/jovyan
jovyan@kubecon-tutorial-0:~$
jovyan@kubecon-tutorial-0:~$ ls
data  down_merge_csv.ipynb  kale.log  lost+found
jovyan@kubecon-tutorial-0:~$
jovyan@kubecon-tutorial-0:~$
이제 위에서 정의한 download_and_merge_csv() 를 사용해서
(a) url='https://storage.googleapis.com/ml-pipeline-playground/iris-csv-files.tar.gz' 로 웹사이트로 부터 압축파일을 열고 모든 파일들을 해제해서
(b) down_dir='downloaded_data' 의 디렉토리에 다운로드하고,
(c) output_csv='iris_merged_data.csv' 라는 이름의 csv 파일로 모든 파일을 합쳐서 내보내기
를 해보겠습니다.
download_and_merge_csv(
    url='https://storage.googleapis.com/ml-pipeline-playground/iris-csv-files.tar.gz',
    down_dir='downloaded_data',
    output_csv='iris_merged_data.csv')
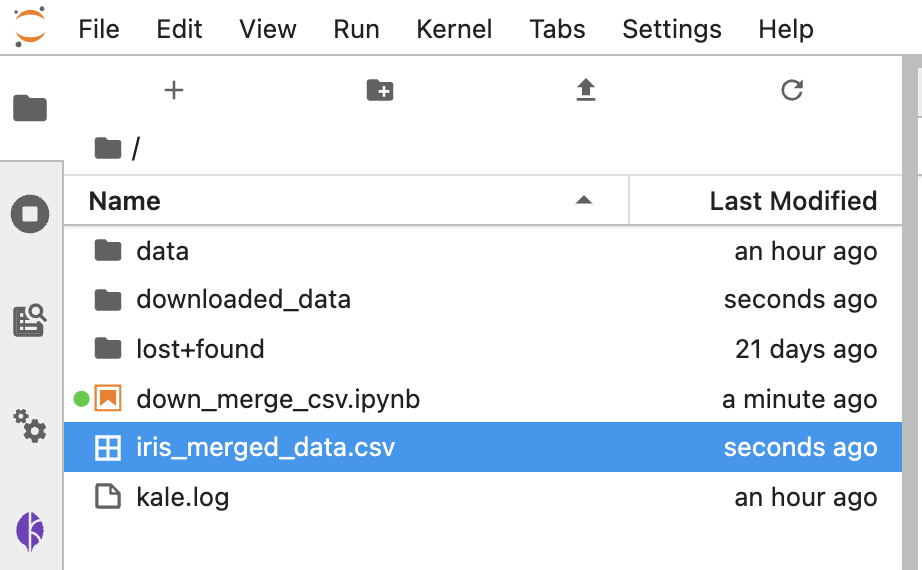
아래의 화면캡쳐처럼 'iris_merged_data.csv' 라는 이름의 csv 파일이 새로 생겼습니다. 그리고 'downloaded_data' 라는 폴더도 새로 생겼습니다.
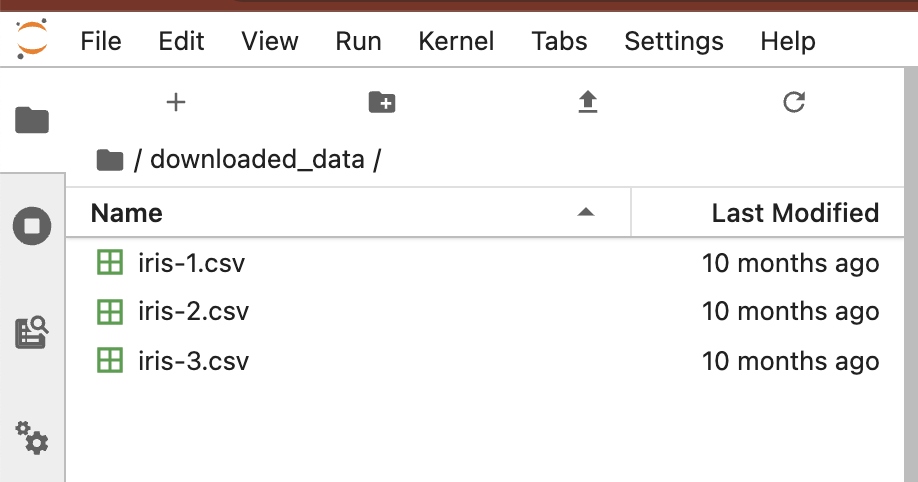
터미널에서 새로 생긴 'downloaded_data' 로 디렉토리를 이동한 다음에, 파일 리스트를 확인해보니 'iris-1.csv', 'iris-2.csv', 'iris-3.csv' 의 3개 파일이 들어있네요. head 로 상위의 10 개 행을 읽어보니 iris 데이터셋이군요.
jovyan@kubecon-tutorial-0:~$ ls
data  downloaded_data  down_merge_csv.ipynb  iris_merged_data.csv  kale.log  lost+found
jovyan@kubecon-tutorial-0:~$
jovyan@kubecon-tutorial-0:~$
jovyan@kubecon-tutorial-0:~$ cd downloaded_data/
jovyan@kubecon-tutorial-0:~/downloaded_data$ ls
iris-1.csv  iris-2.csv  iris-3.csv
jovyan@kubecon-tutorial-0:~/downloaded_data$
jovyan@kubecon-tutorial-0:~/downloaded_data$
jovyan@kubecon-tutorial-0:~/downloaded_data$ head iris-1.csv
5.1,3.5,1.4,0.2,setosa
4.9,3.0,1.4,0.2,setosa
4.7,3.2,1.3,0.2,setosa
4.6,3.1,1.5,0.2,setosa
5.0,3.6,1.4,0.2,setosa
5.4,3.9,1.7,0.4,setosa
4.6,3.4,1.4,0.3,setosa
5.0,3.4,1.5,0.2,setosa
4.4,2.9,1.4,0.2,setosa
4.9,3.1,1.5,0.1,setosa
jovyan@kubecon-tutorial-0:~/downloaded_data$
이번 포스팅이 많은 도움이 되었기를 바랍니다.
행복한 데이터 과학자 되세요. :-)

'Python 분석과 프로그래밍 > Python 설치 및 기본 사용법' 카테고리의 다른 글
| [Python] 여러개의 Python 패키지, 모듈을 한꺼번에 설치하는 방법 (0) | 2023.03.12 |
|---|---|
| [Jupyter Notebook] 주피터 노트북의 Cell 결과 모두 지우고, 새로 시작하기 (0) | 2023.03.05 |
| [Python] zipfile 모듈로 압축 파일 쓰기, 읽기, 해제하기, 열기, 닫기 (2) | 2021.01.09 |
| [Python] 파이썬 사전형을 일정 간격을 두고 키와 값을 인쇄하기 (Python Dict Print Options) (0) | 2020.08.31 |
| [Python] 기존 함수를 재활용해 매개변수 값을 고정하여 새로운 함수 만들기: Functools partial() 함수 (0) | 2020.03.18 |