Kubernetes 기반의 기계학습 워크플로우를 간소화해주는 Kubeflow 의 Pipelines 를 생성할 때 YAML 파일을 사용합니다. YAML 파일을 쓸 때 들여쓰기나 대소문자에 신경을 써야 하므로, 아무래도 텍스트 편집기나 vmi 편집 기능을 쓰는 것보다는 Kubernetes 를 지원하는 IDE (Integrated Development Environment) 를 사용하는 것이 코딩을 쉽고 빠르게 할 수 있도록 도와주고 또 에러가 사전에 방지할 수 있어서 여러모로 좋습니다.
이번 포스팅에서는 K8s 를 지원하는 프로그래밍 IDE 중에서도 무료로 사용할 수 있는 MS 의
(1) Visual Studio Code 를 설치하고,
(2) Visual Studio Code 에 Kubernetes YAML 언어 지원 확장 팩을 설치하고 설정하고,
(3) Visual Studio Code 의 기능 소개
를 해보겠습니다.
(1) Visual Studio Code 를 설치
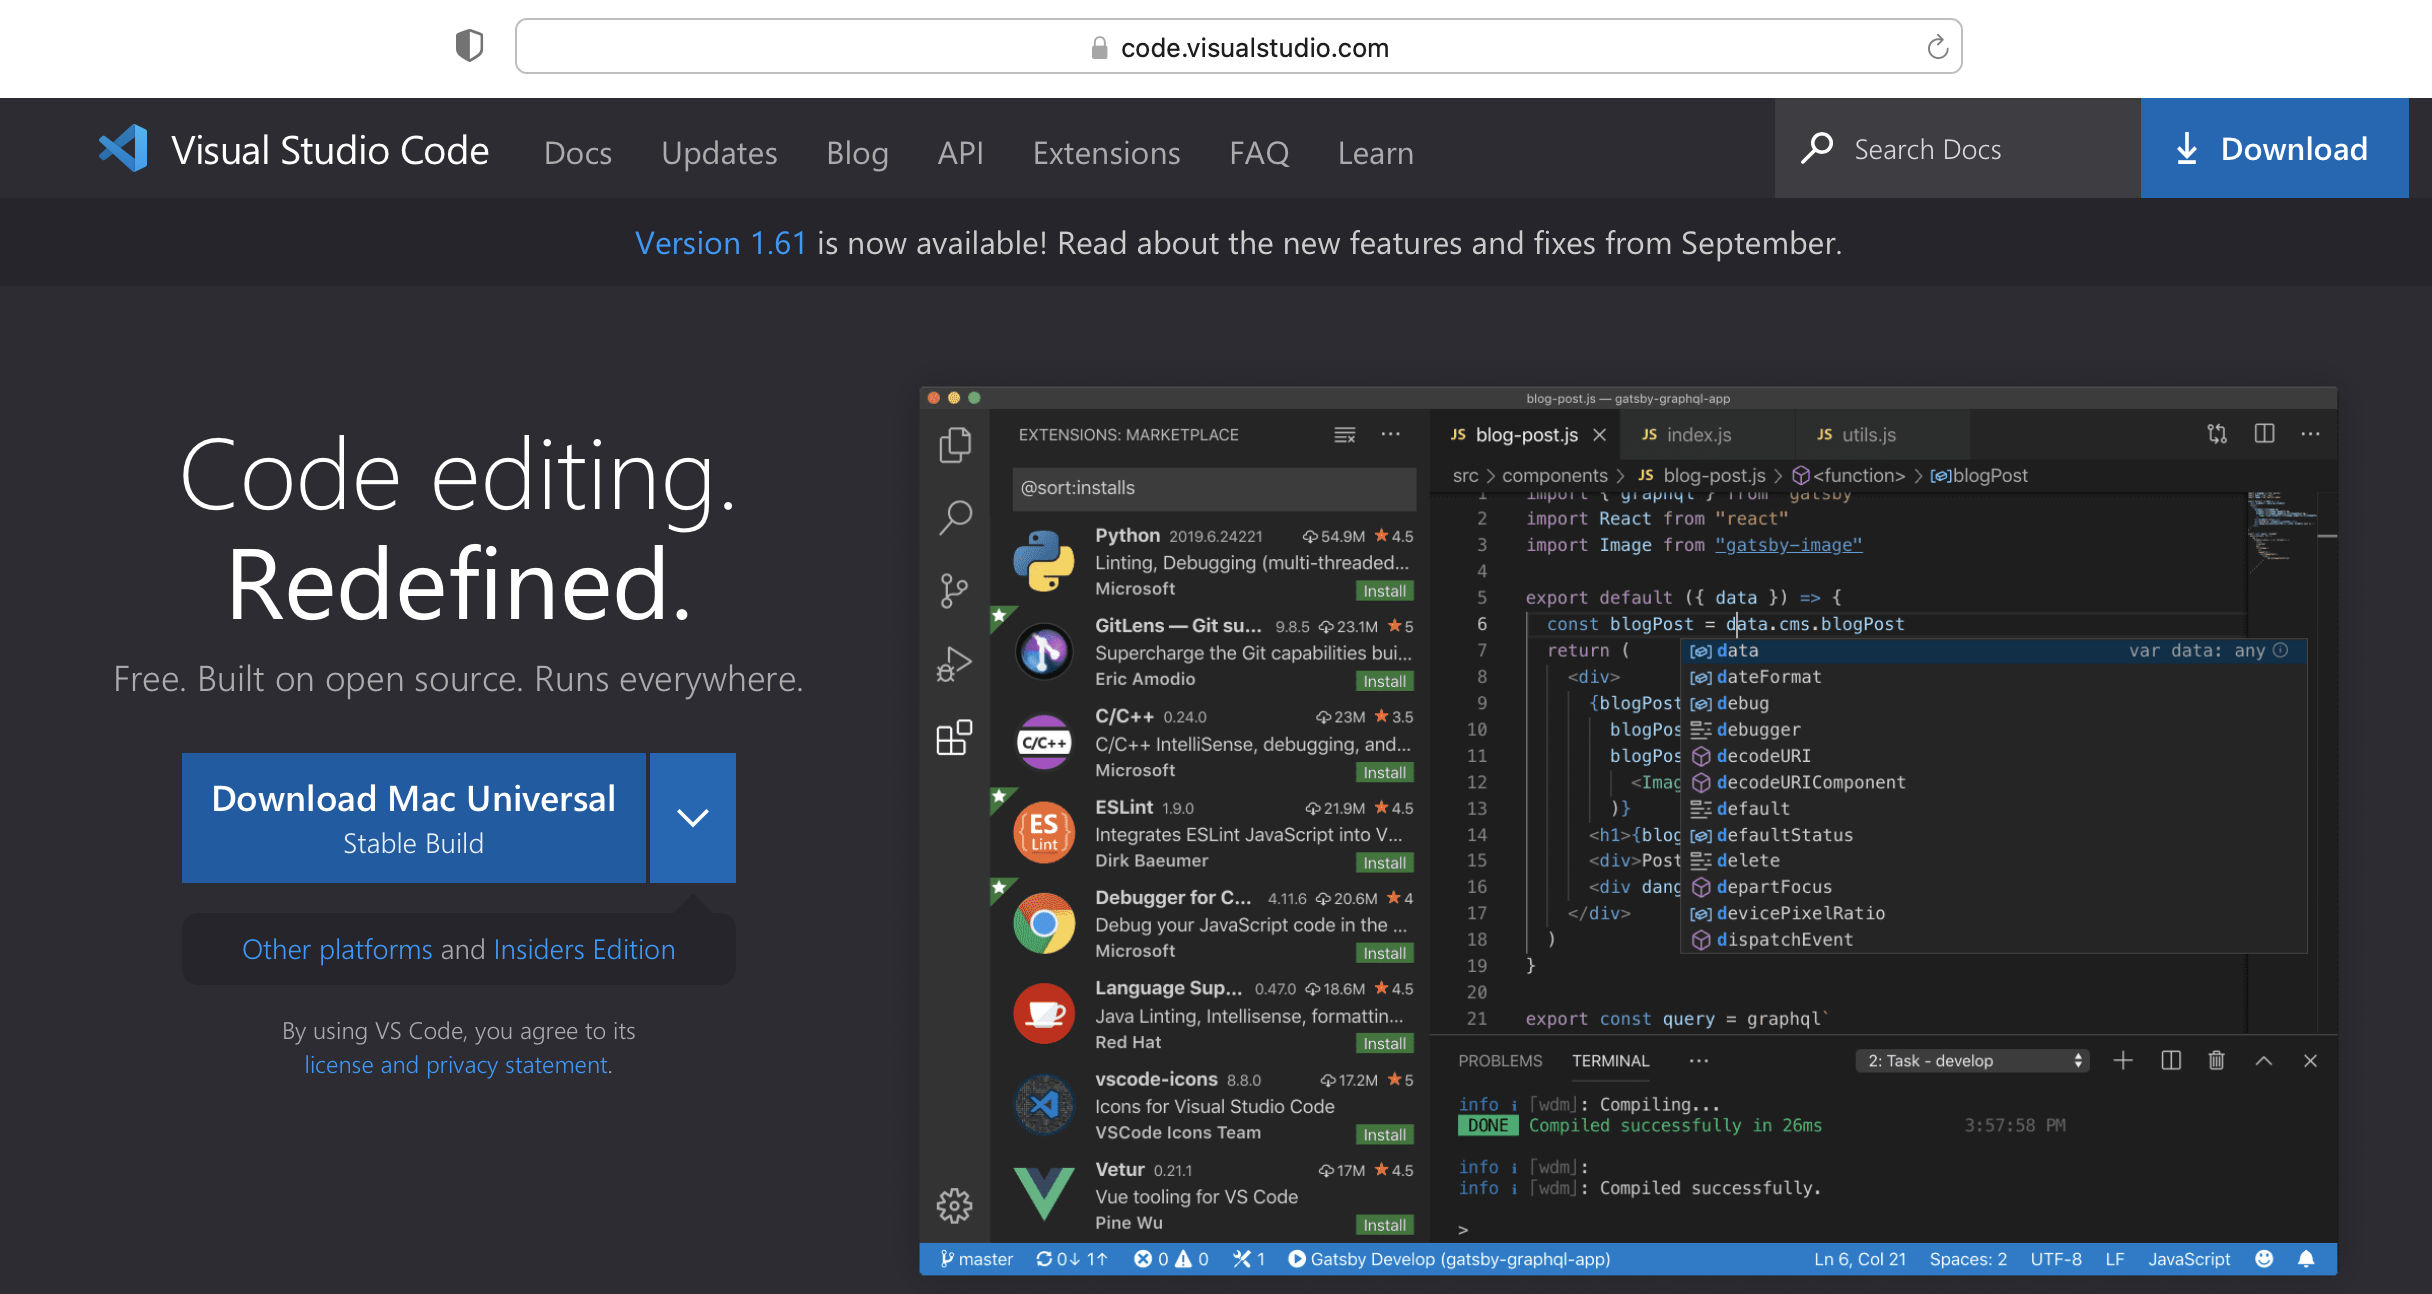
Visual Studio Code 의 홈페이지인 https://code.visualstudio.com/ 에 방문해서 자신이 사용하는 컴퓨터의 OS 에 맞게 VS Code 설치 파일을 다운로드 하여 설치(install)하면 됩니다.
저는 MacBook 을 사용하고 있으므로 'Download Mac Universal (Stable Build)' 를 다운로드 해서 설치했습니다.
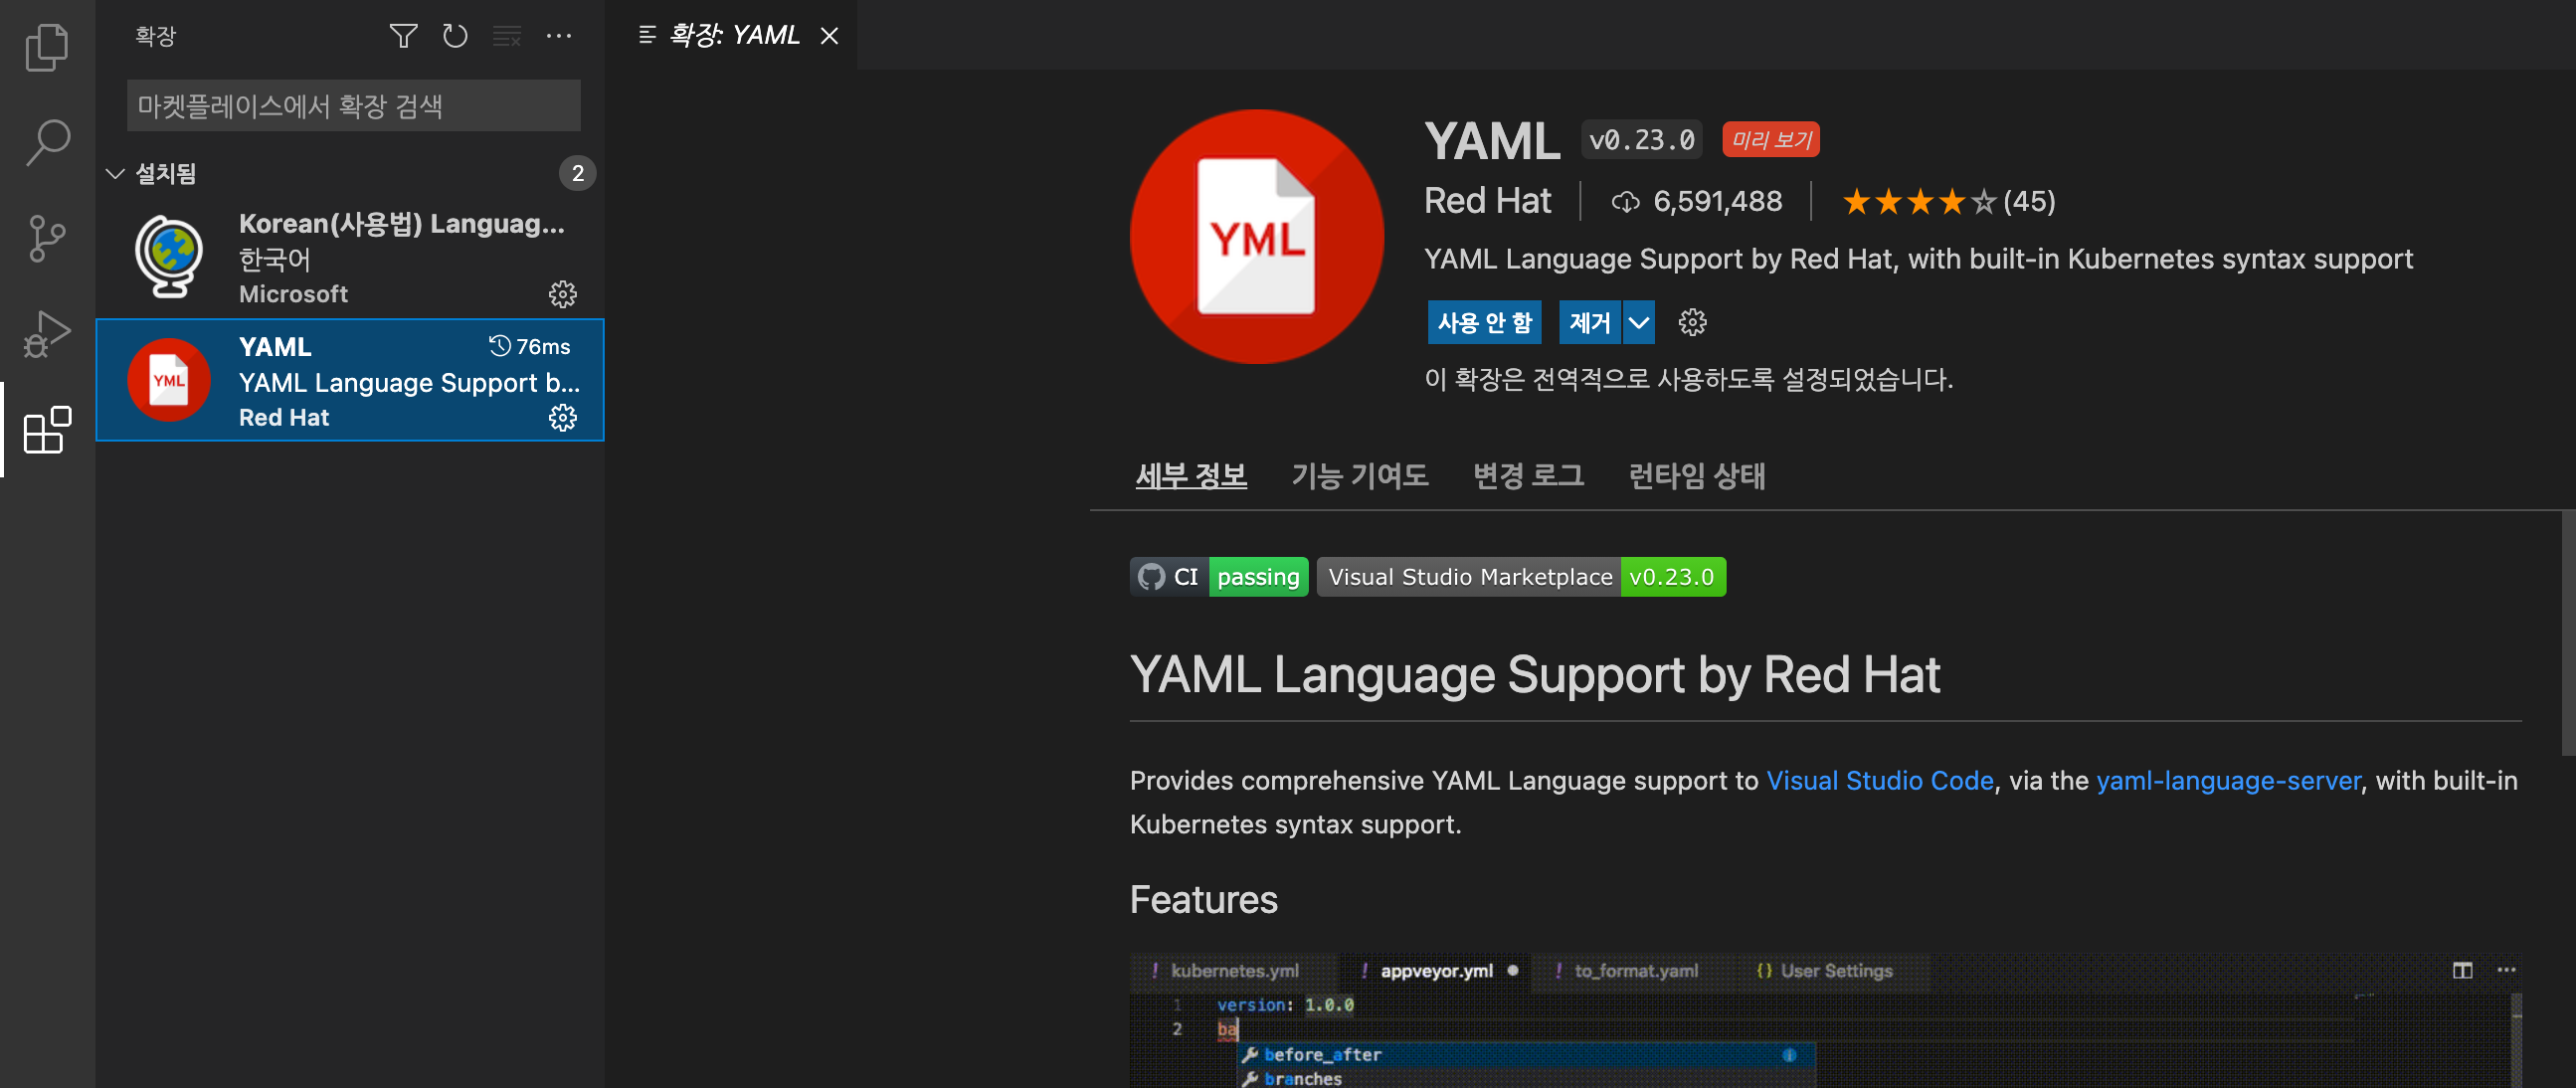
(2) Visual Studio Code 에 Kubernetes YAML 언어 지원 확장 팩을 설치하고 설정
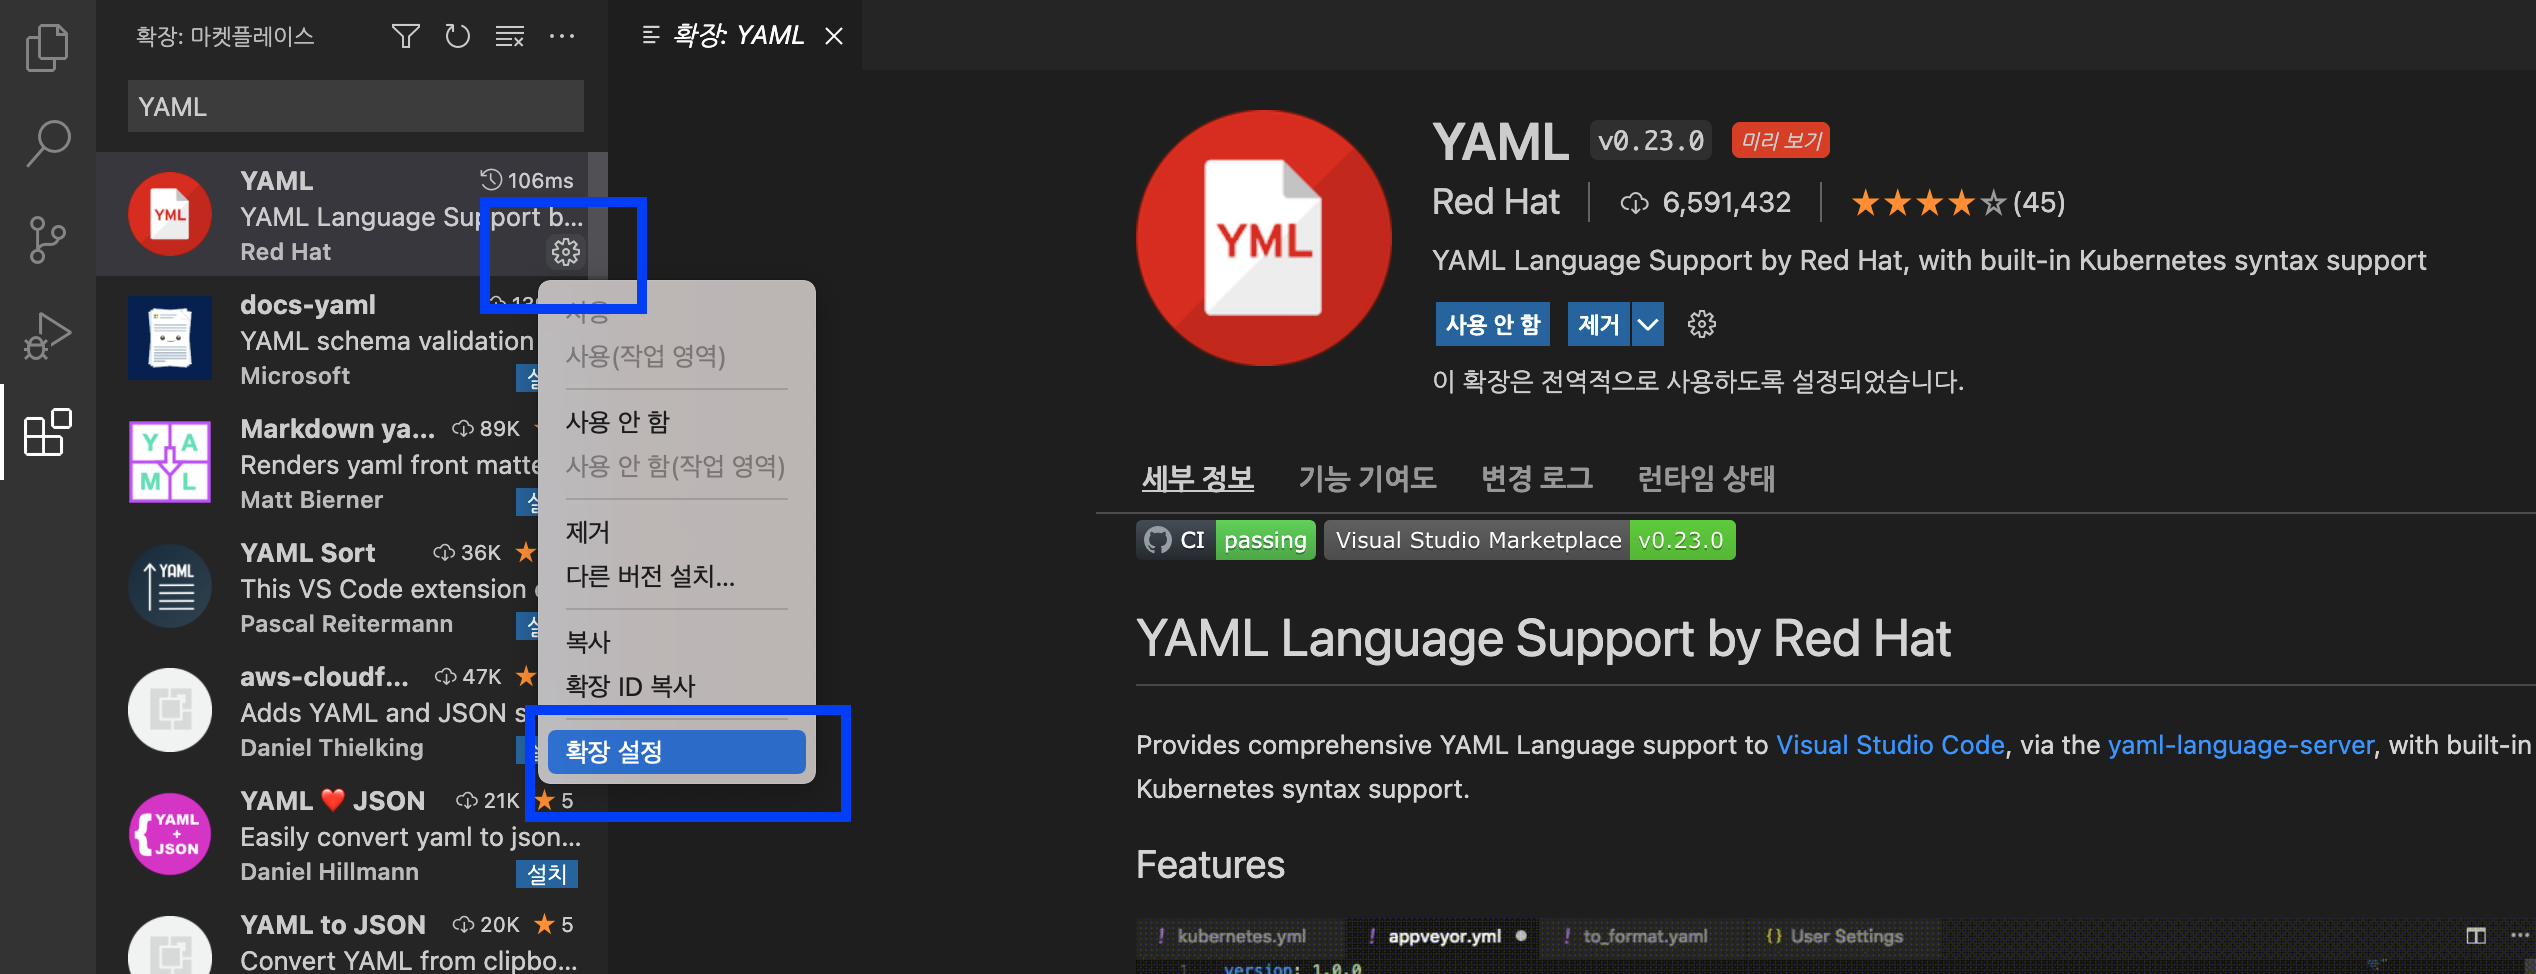
Visual Studio Code 에 Kubernetes YAML 파일의 코드를 인식하고 지원할 수 있도록 Red Hat 에서 제공하는 YAML 확장 팩을 설치해보겠습니다.
Visual Studio Code 의 제일 왼쪽 메뉴의 제일 밑에 있는 네모 모양 (4개의 네모)의 메뉴를 선택한 후 --> YAML 키워드로 검색해서 --> YAML Language Support by Red Hat, with built-in Kubernetes syntax support 를 선택 --> 설치 (install) 단추 클릭
의 순서로 K8s 언어 지원 확장 팩을 설치해 줍니다.

YAML Red Hat 확장 팩을 설치 했으면, 좌측 YAML 의 톱니바퀴 모양의 설정 단추를 선택하고 --> '확장 설정' 을 선택합니다.
스크롤바를 밑으로 쭉 내리다보면 'Yaml: Schemas' --> 'setting.json 에서 편집' 을 선택합니다.
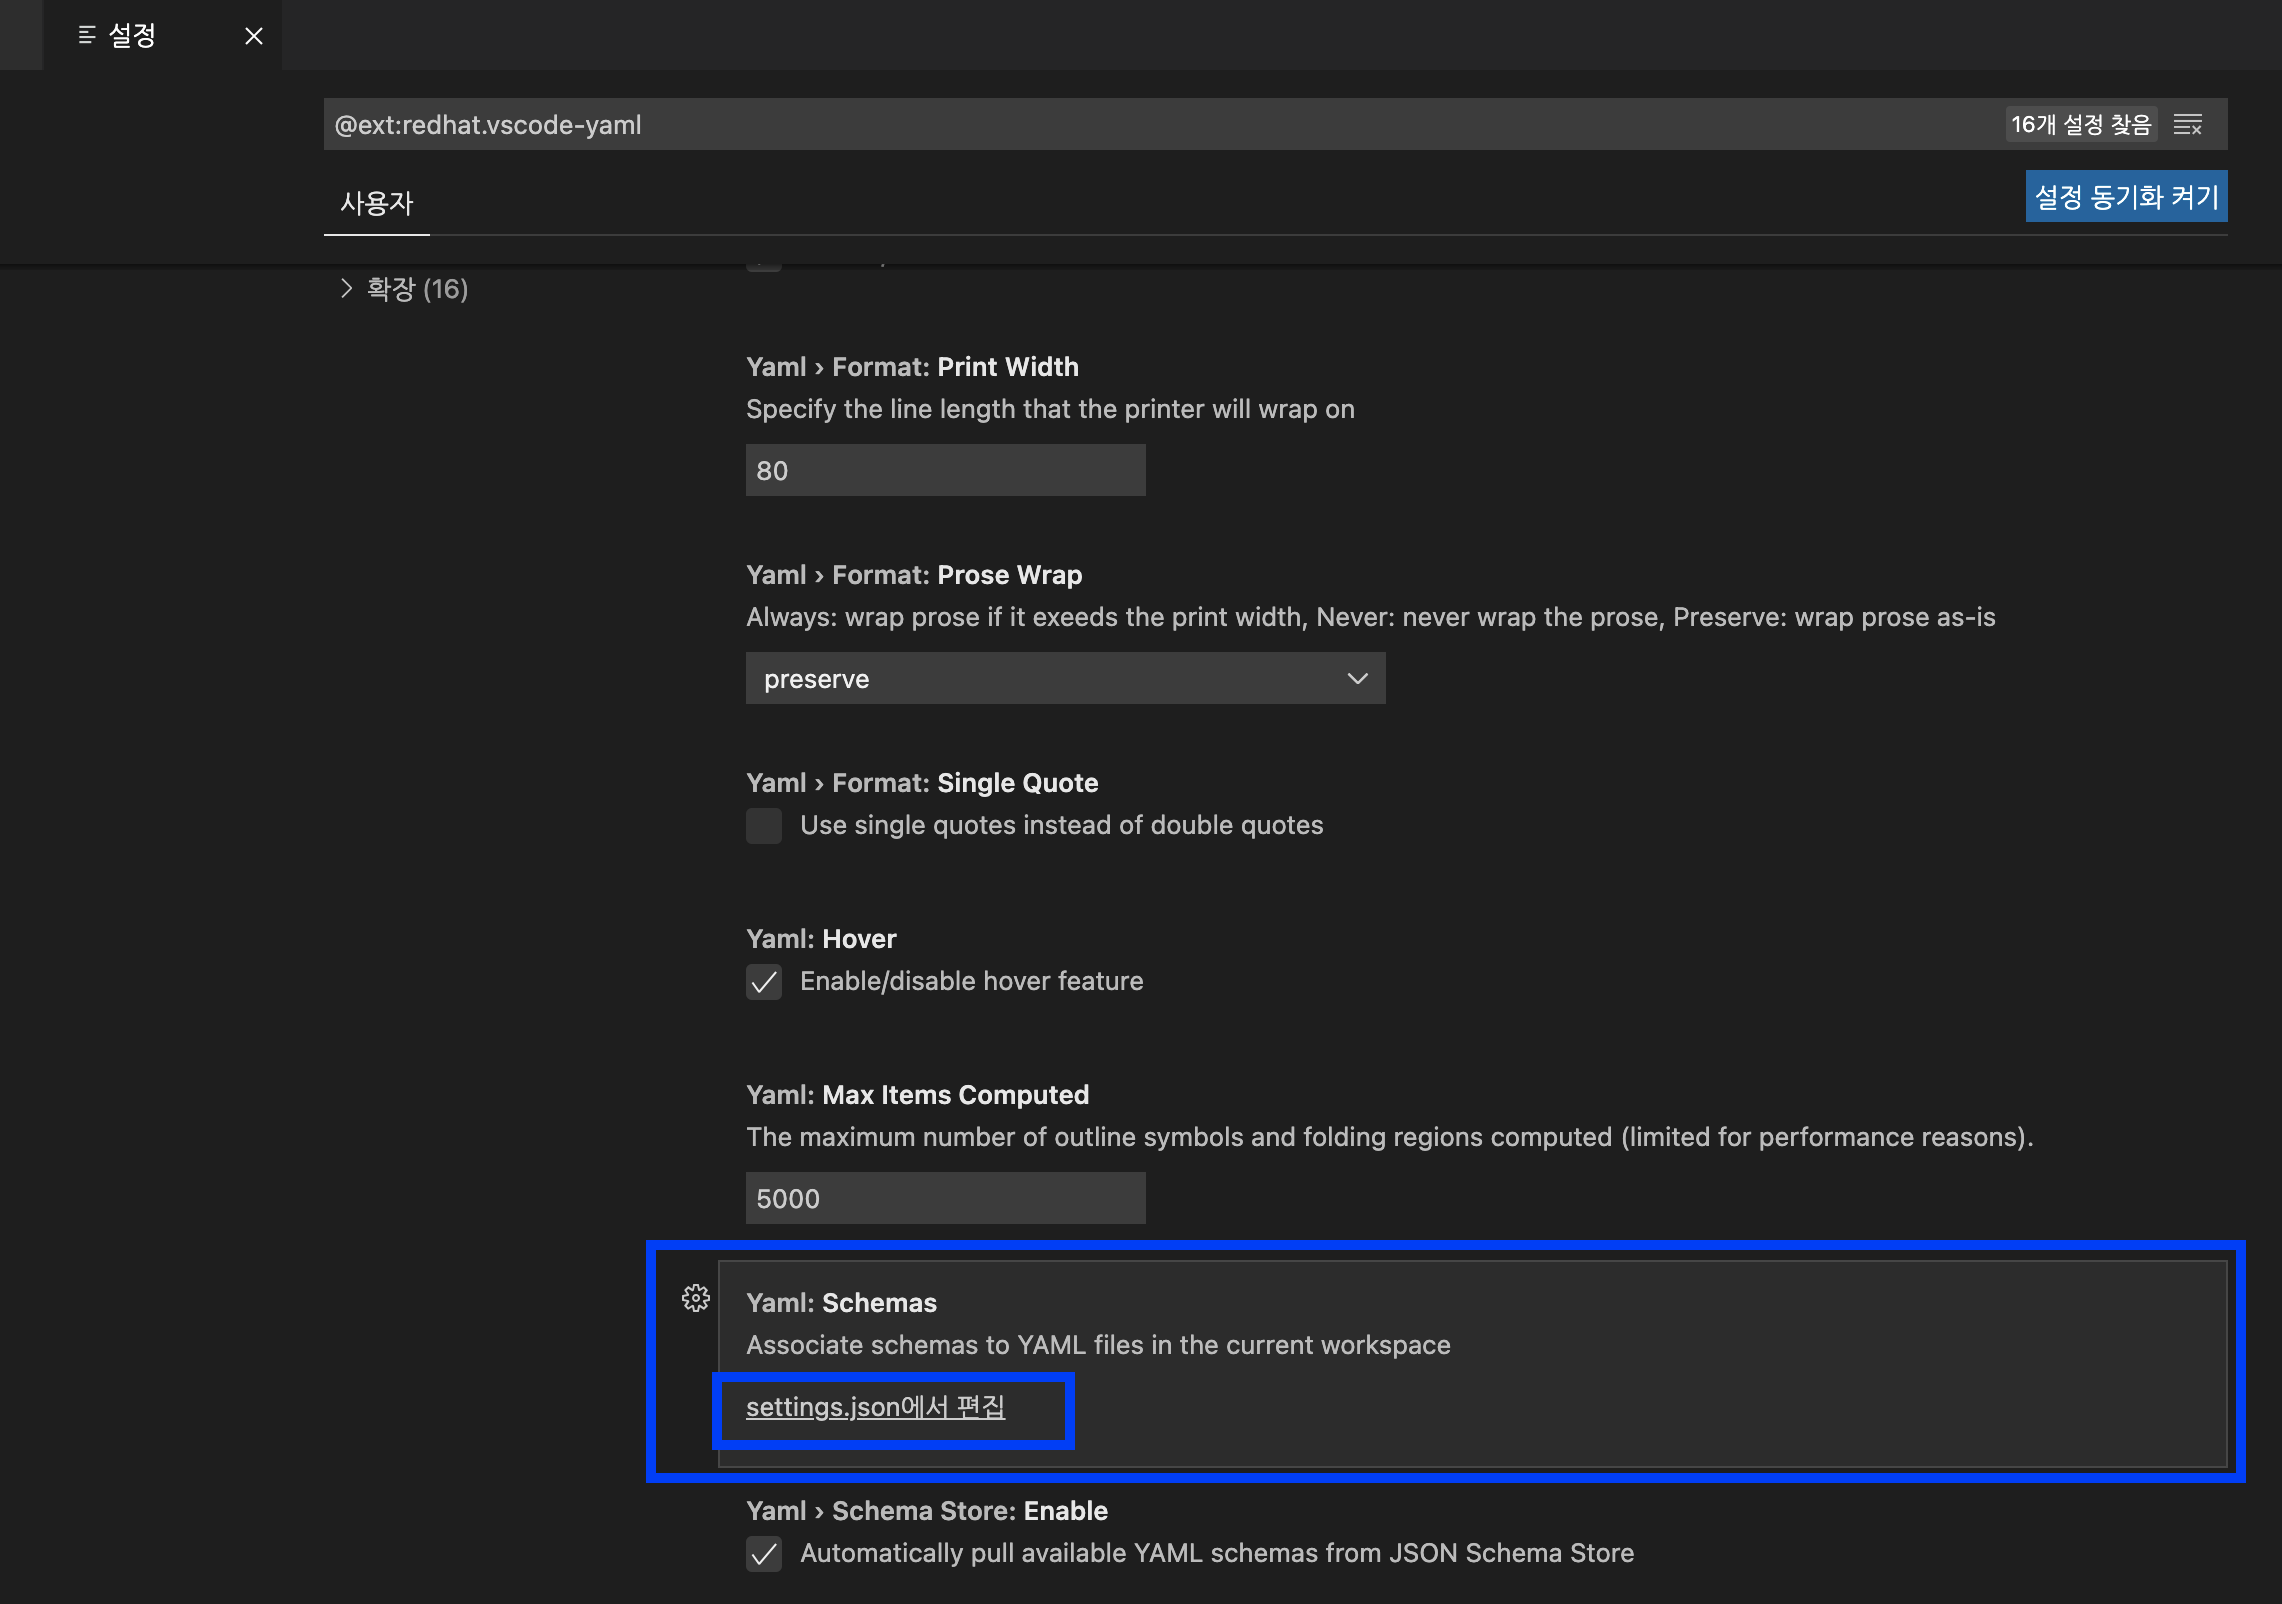
아래의 'setting.json 에서 편집' 창이 비어있을 텐데요, Kubernetes 가 모든 YAML 파일("*.yaml")을 인식할 수 있도록 대괄호 {} 안에 JSON 파일에 입력해줍니다.
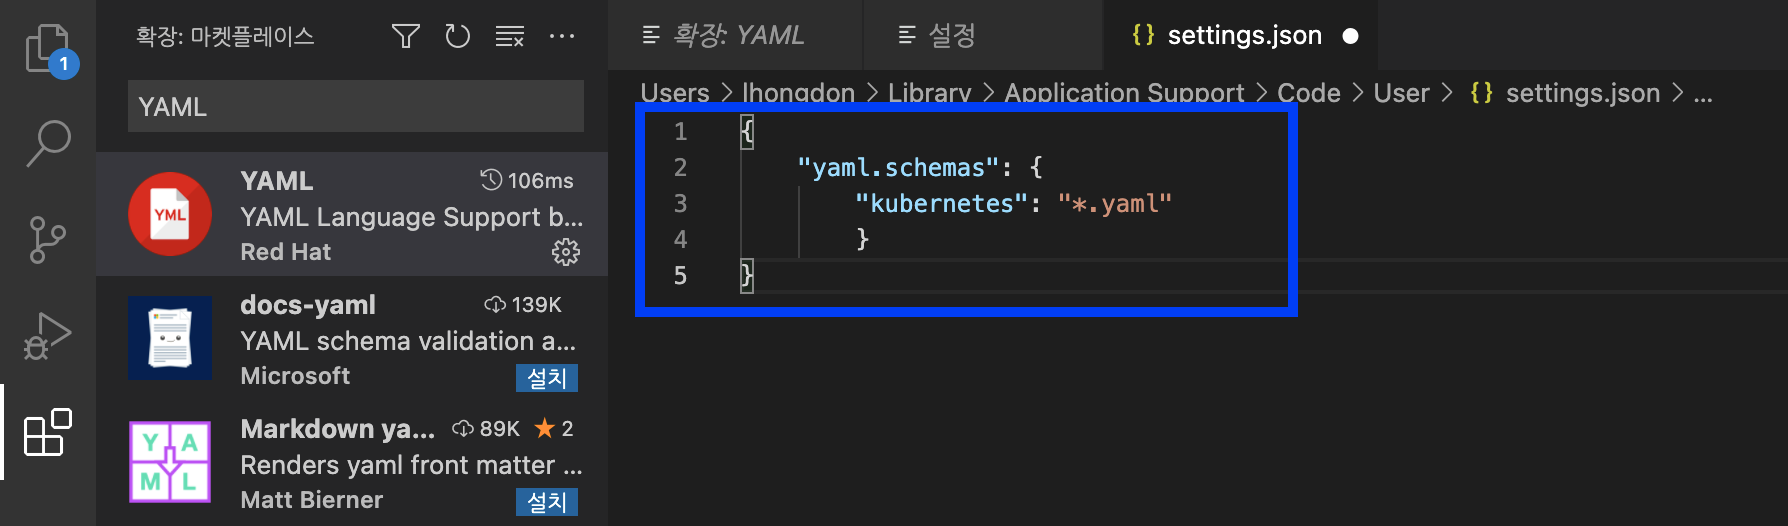
{
    "yaml.schemas": {
        "kubernetes": "*.yaml"
        },
}
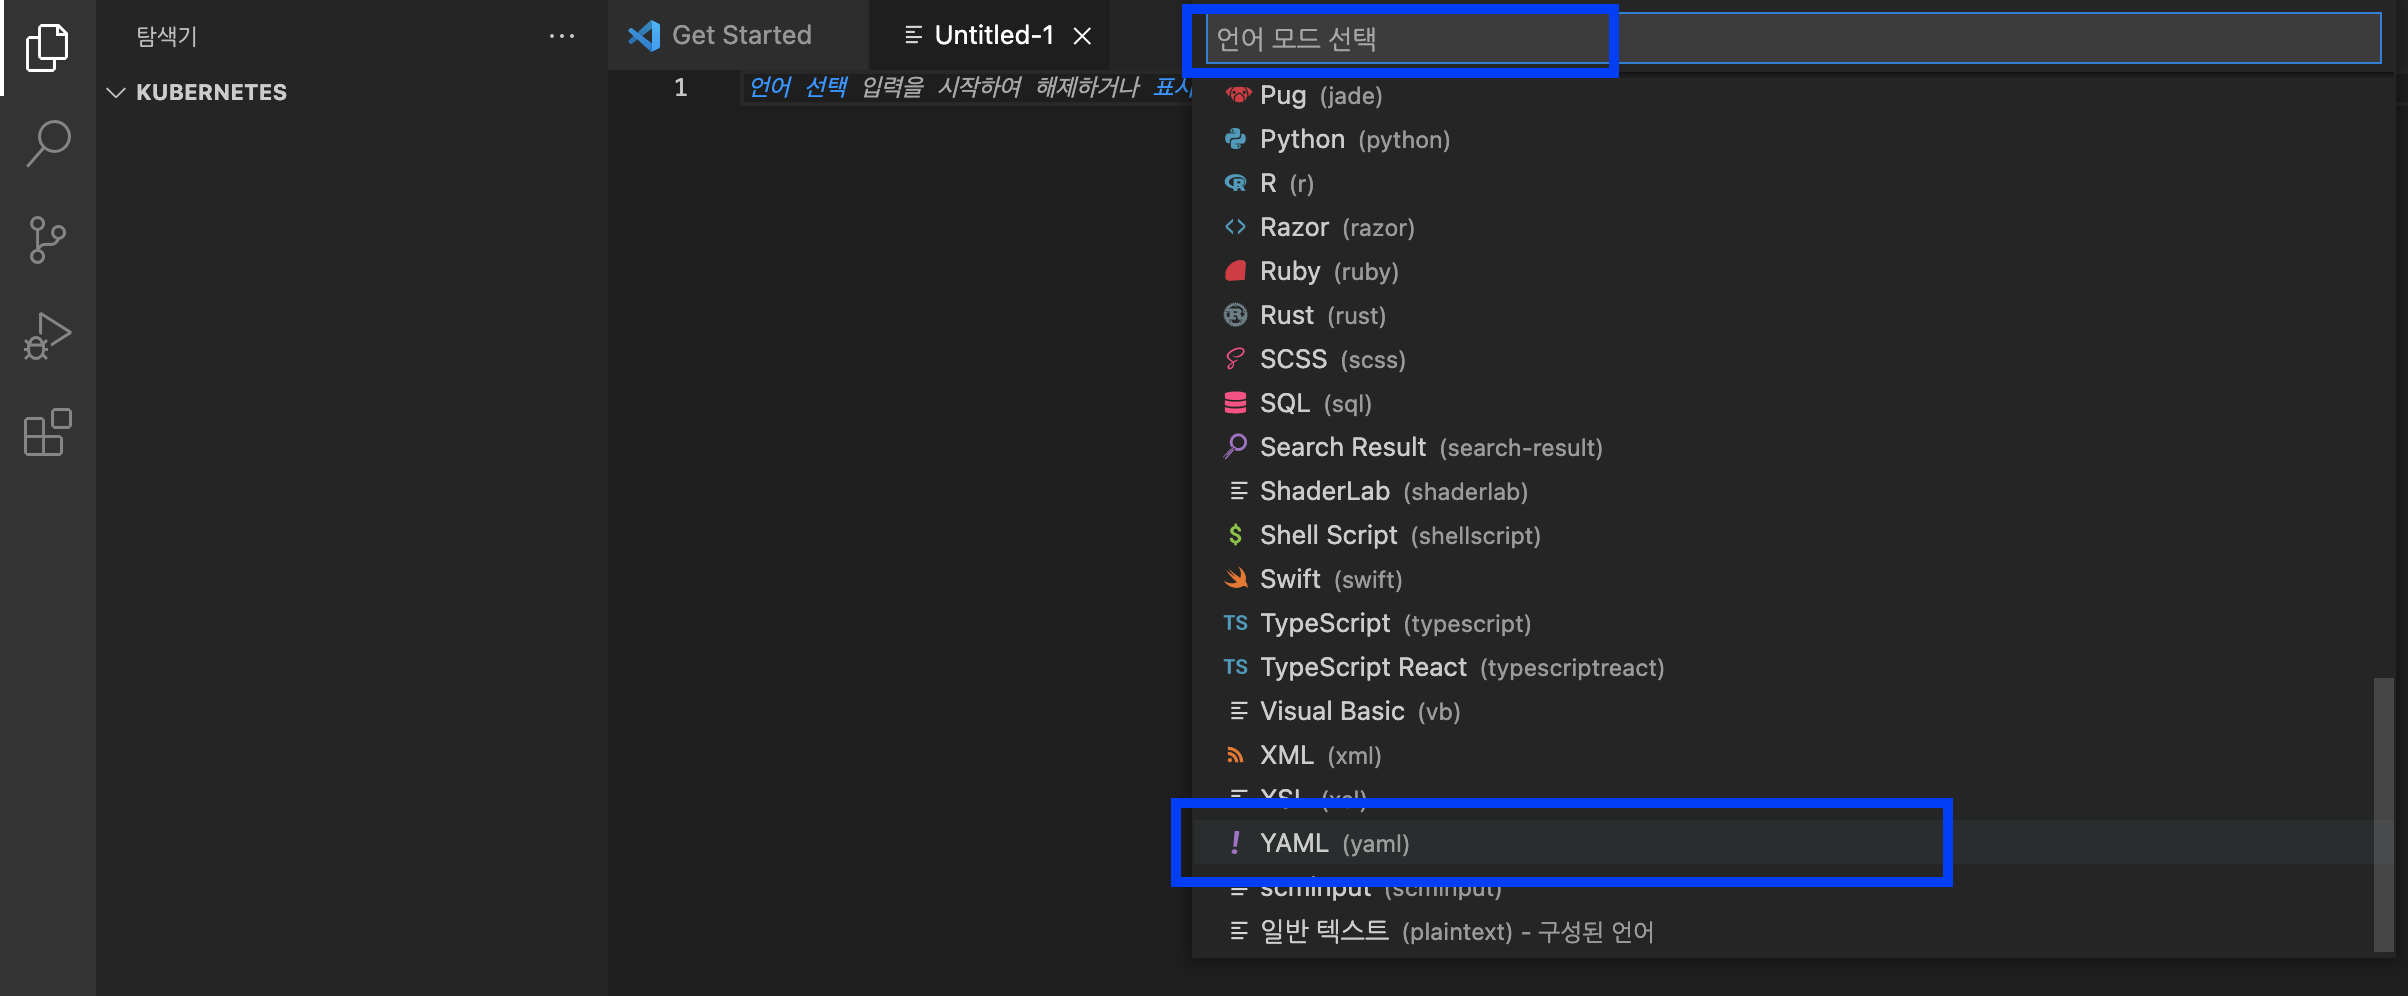
'settings.json' 파일을 저장하고 닫은 다음에, --> Visual Studio Code 를 종료 --> Visual Studio Code 를 다시 시작 합니다. 이제부터 VS Code 에서 K8s 에서 인식하는 모든 YAML 언어지원이 사용가능해요.
(3) Visual Studio Code 의 기능 소개
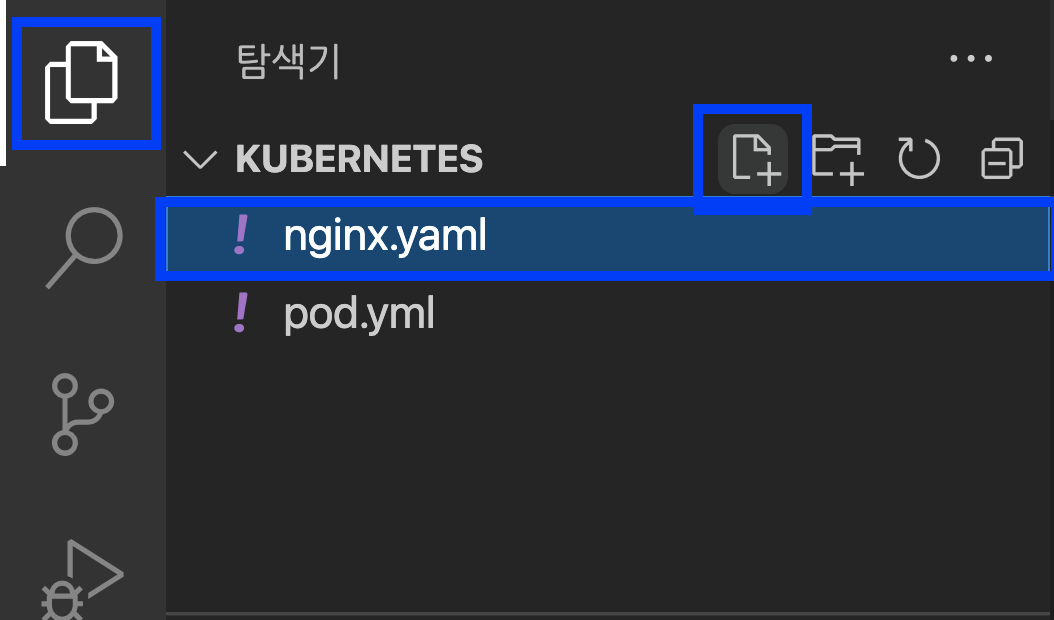
이제 Visual Studio Code 에서 YAML 언어를 선택해서 --> YAML 파일을 생성해보겠습니다.
왼쪽 메뉴바의 제일 위에 있는 '신규 생성' --> 탐색기에서 '신규 파일 +' 클릭 --> '신규 파일 이름 입력 (예: nginx.yaml)
해줍니다.
Visual Studio Code 는 신규 생성 파일이 YAML 임을 인식하고는 apiVersion, kind, metadata, spec 을 알려주고, 들여쓰기라든지, dictionary / array 포맷도 알아서 해주고ㅡ Kubernetes YAML 파일의 포맷에 맞추어서 적당한 명령어를 추천(Recommendation) 해줍니다. 이 기능은 편리하기도 하고, 휴먼 에러를 줄일 수 있어서 매우 유용합니다.
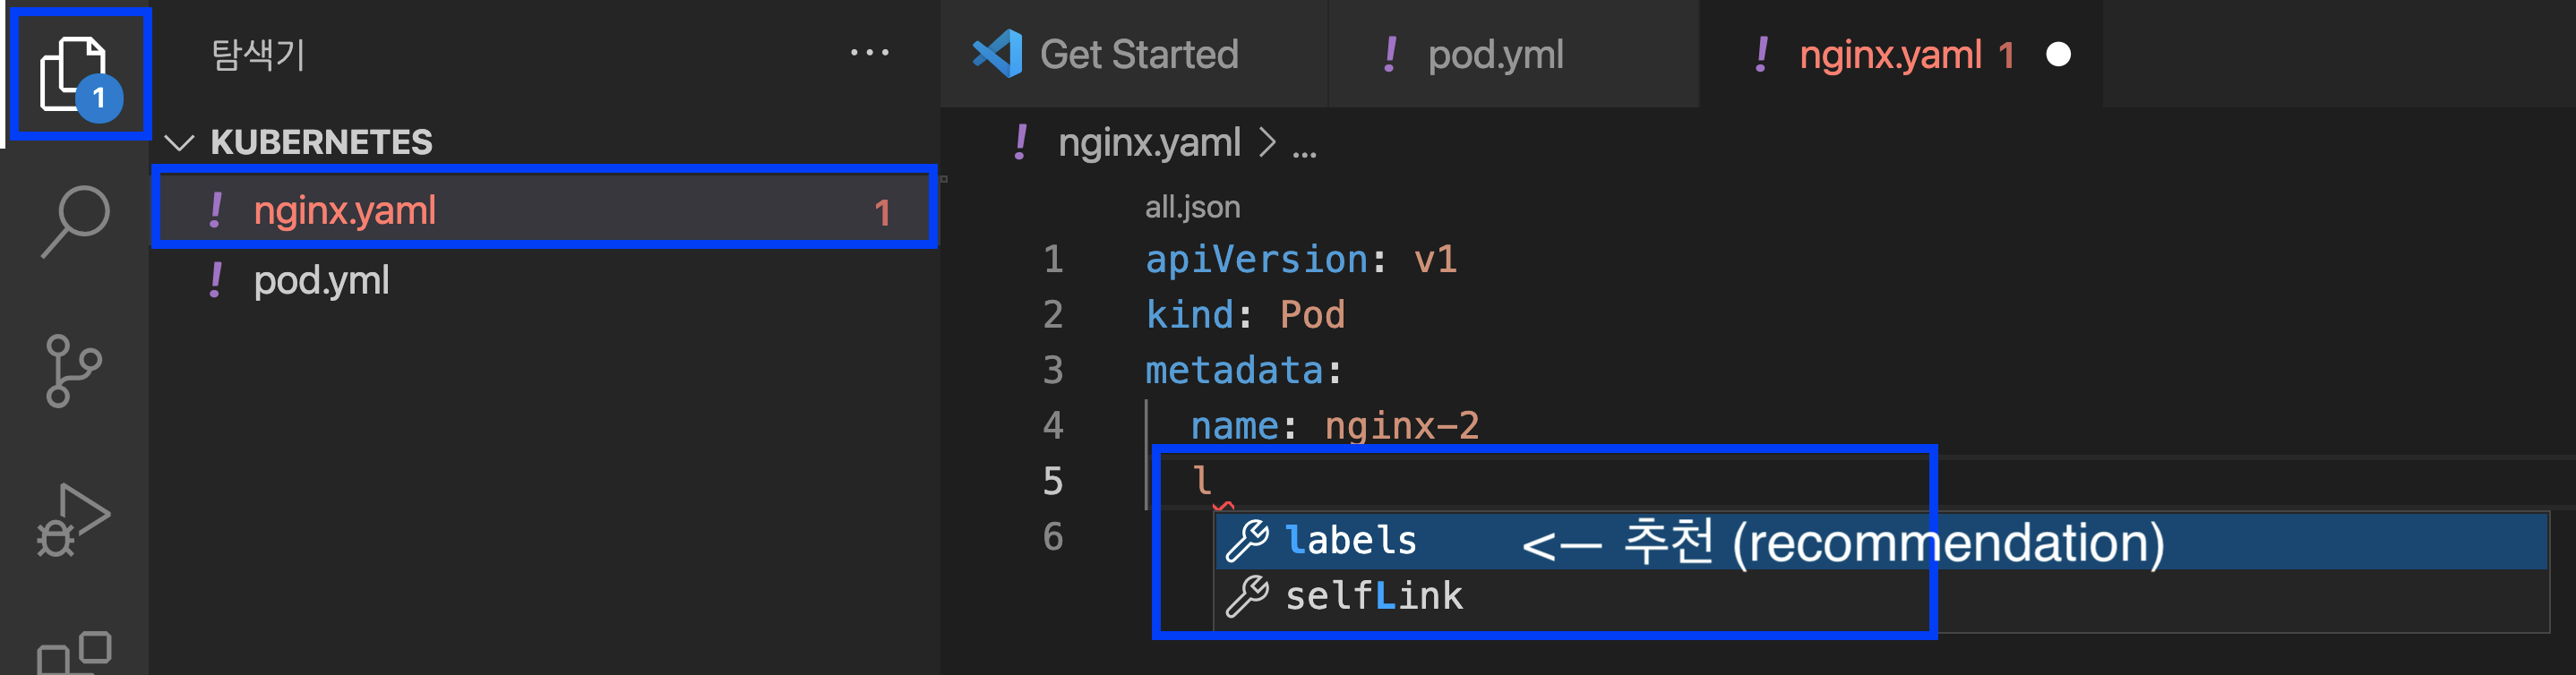
만약 Kubernetes YAML 코딩을 하다가 잘못된 부분이 있으면 에러 메시지를 팝업으로 띄워주고, 하단의 '문제 (problem)' 메뉴에도 에러가 있는 코드의 라인(예: line 10)과 문제(예: bad indentation of a mapping entry YAML [10, 5]) 의 에러 내용도 볼 수 있습니다. 이 기능은 디버깅을 할 때 매우 유용합니다.
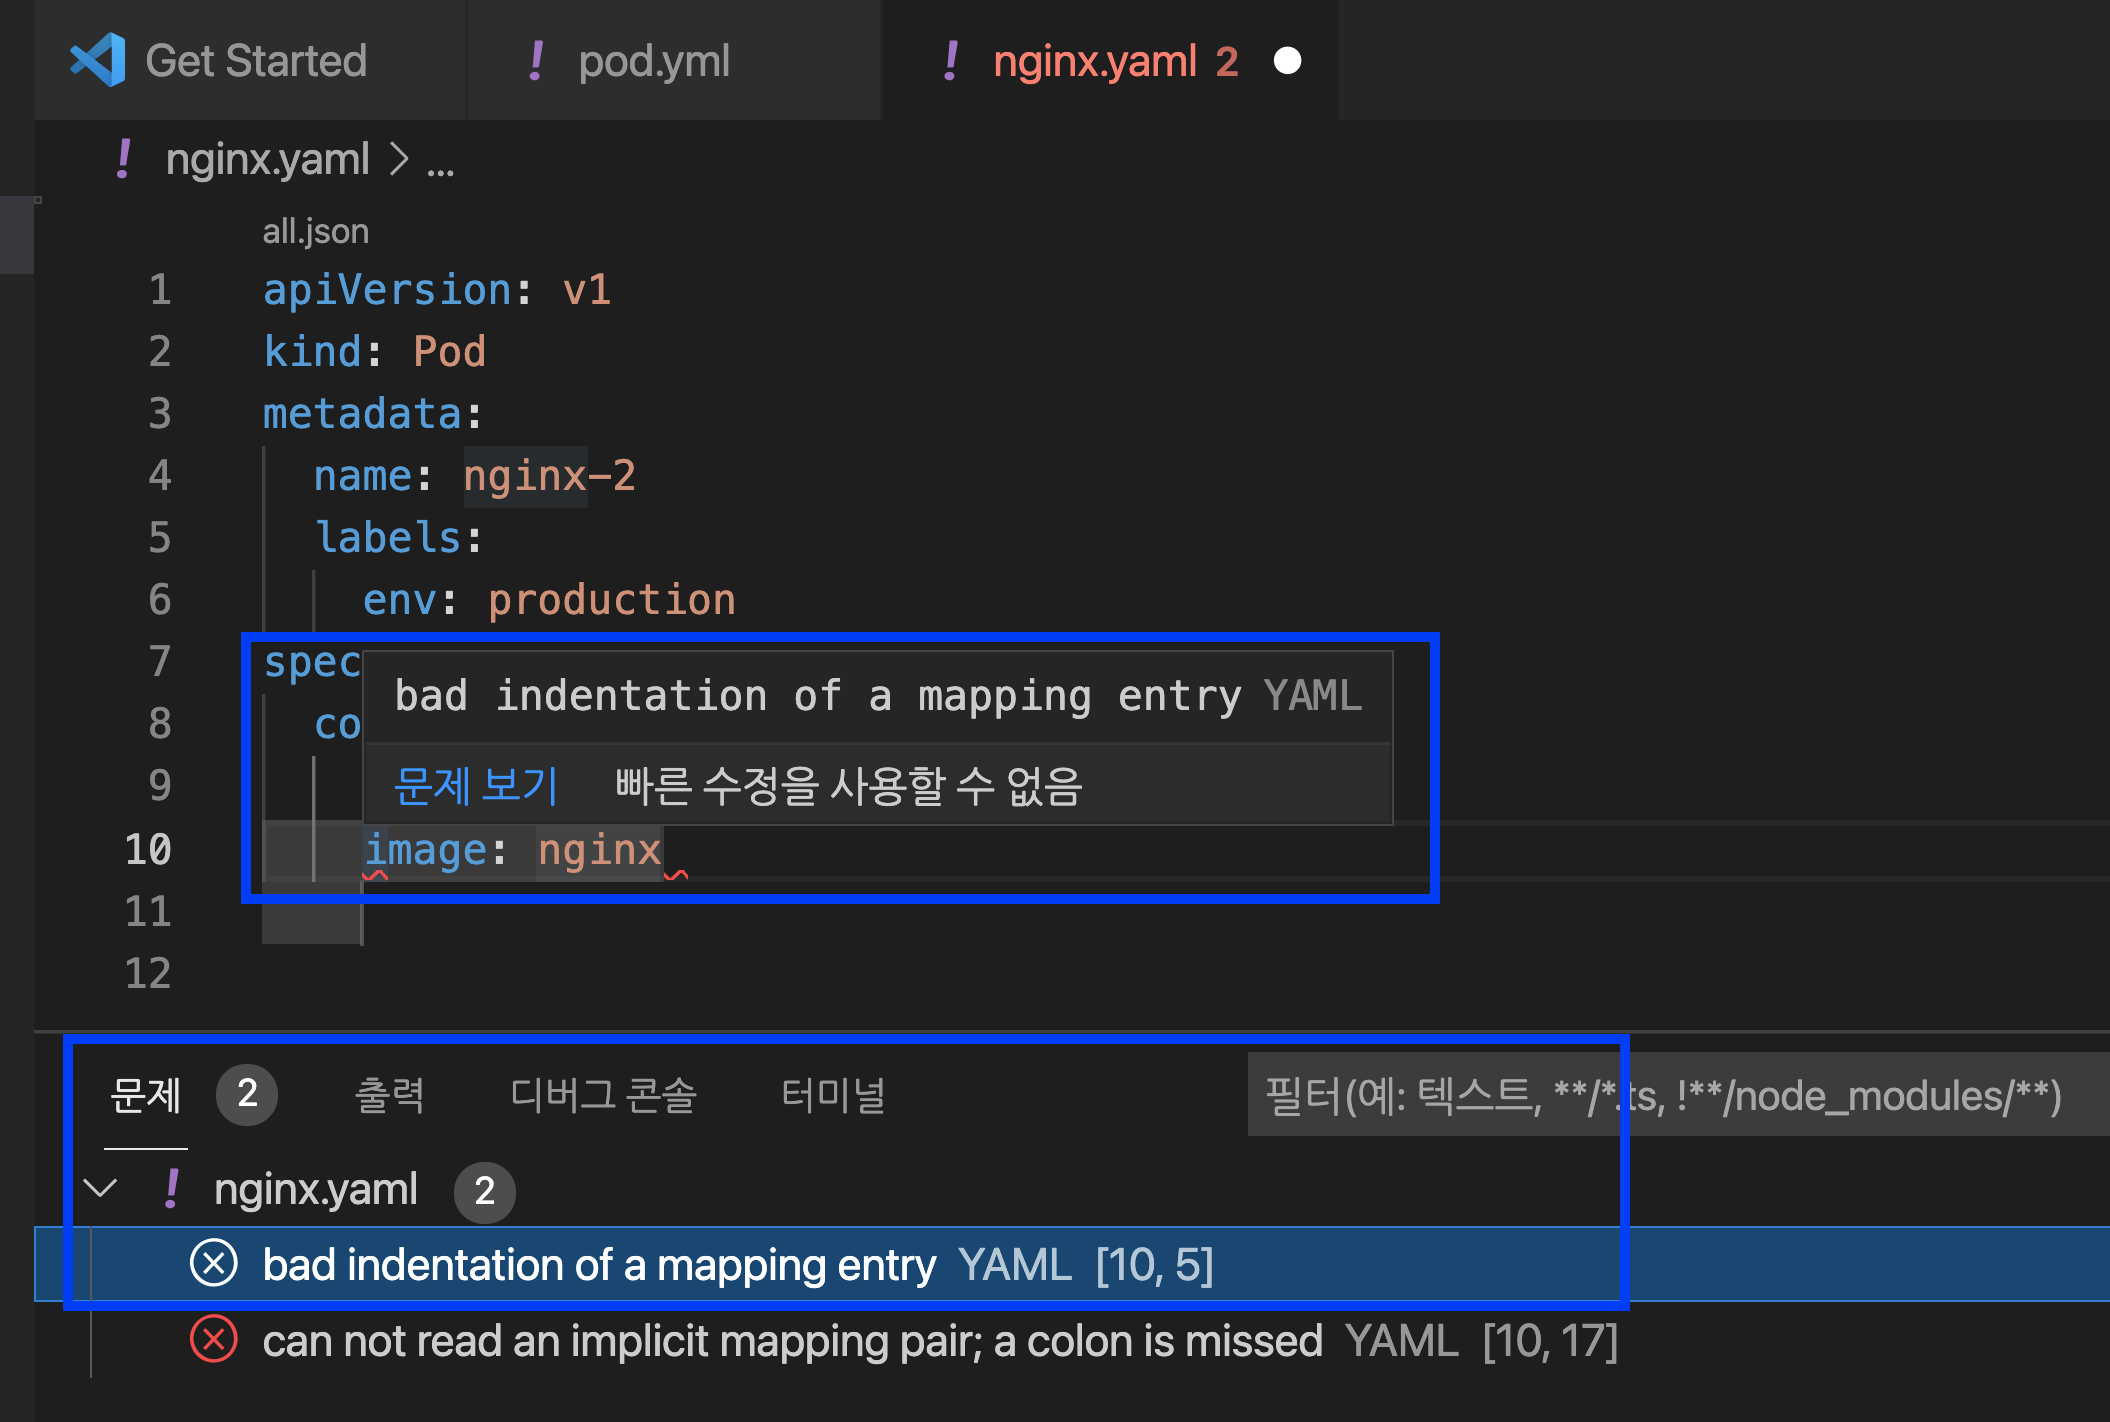
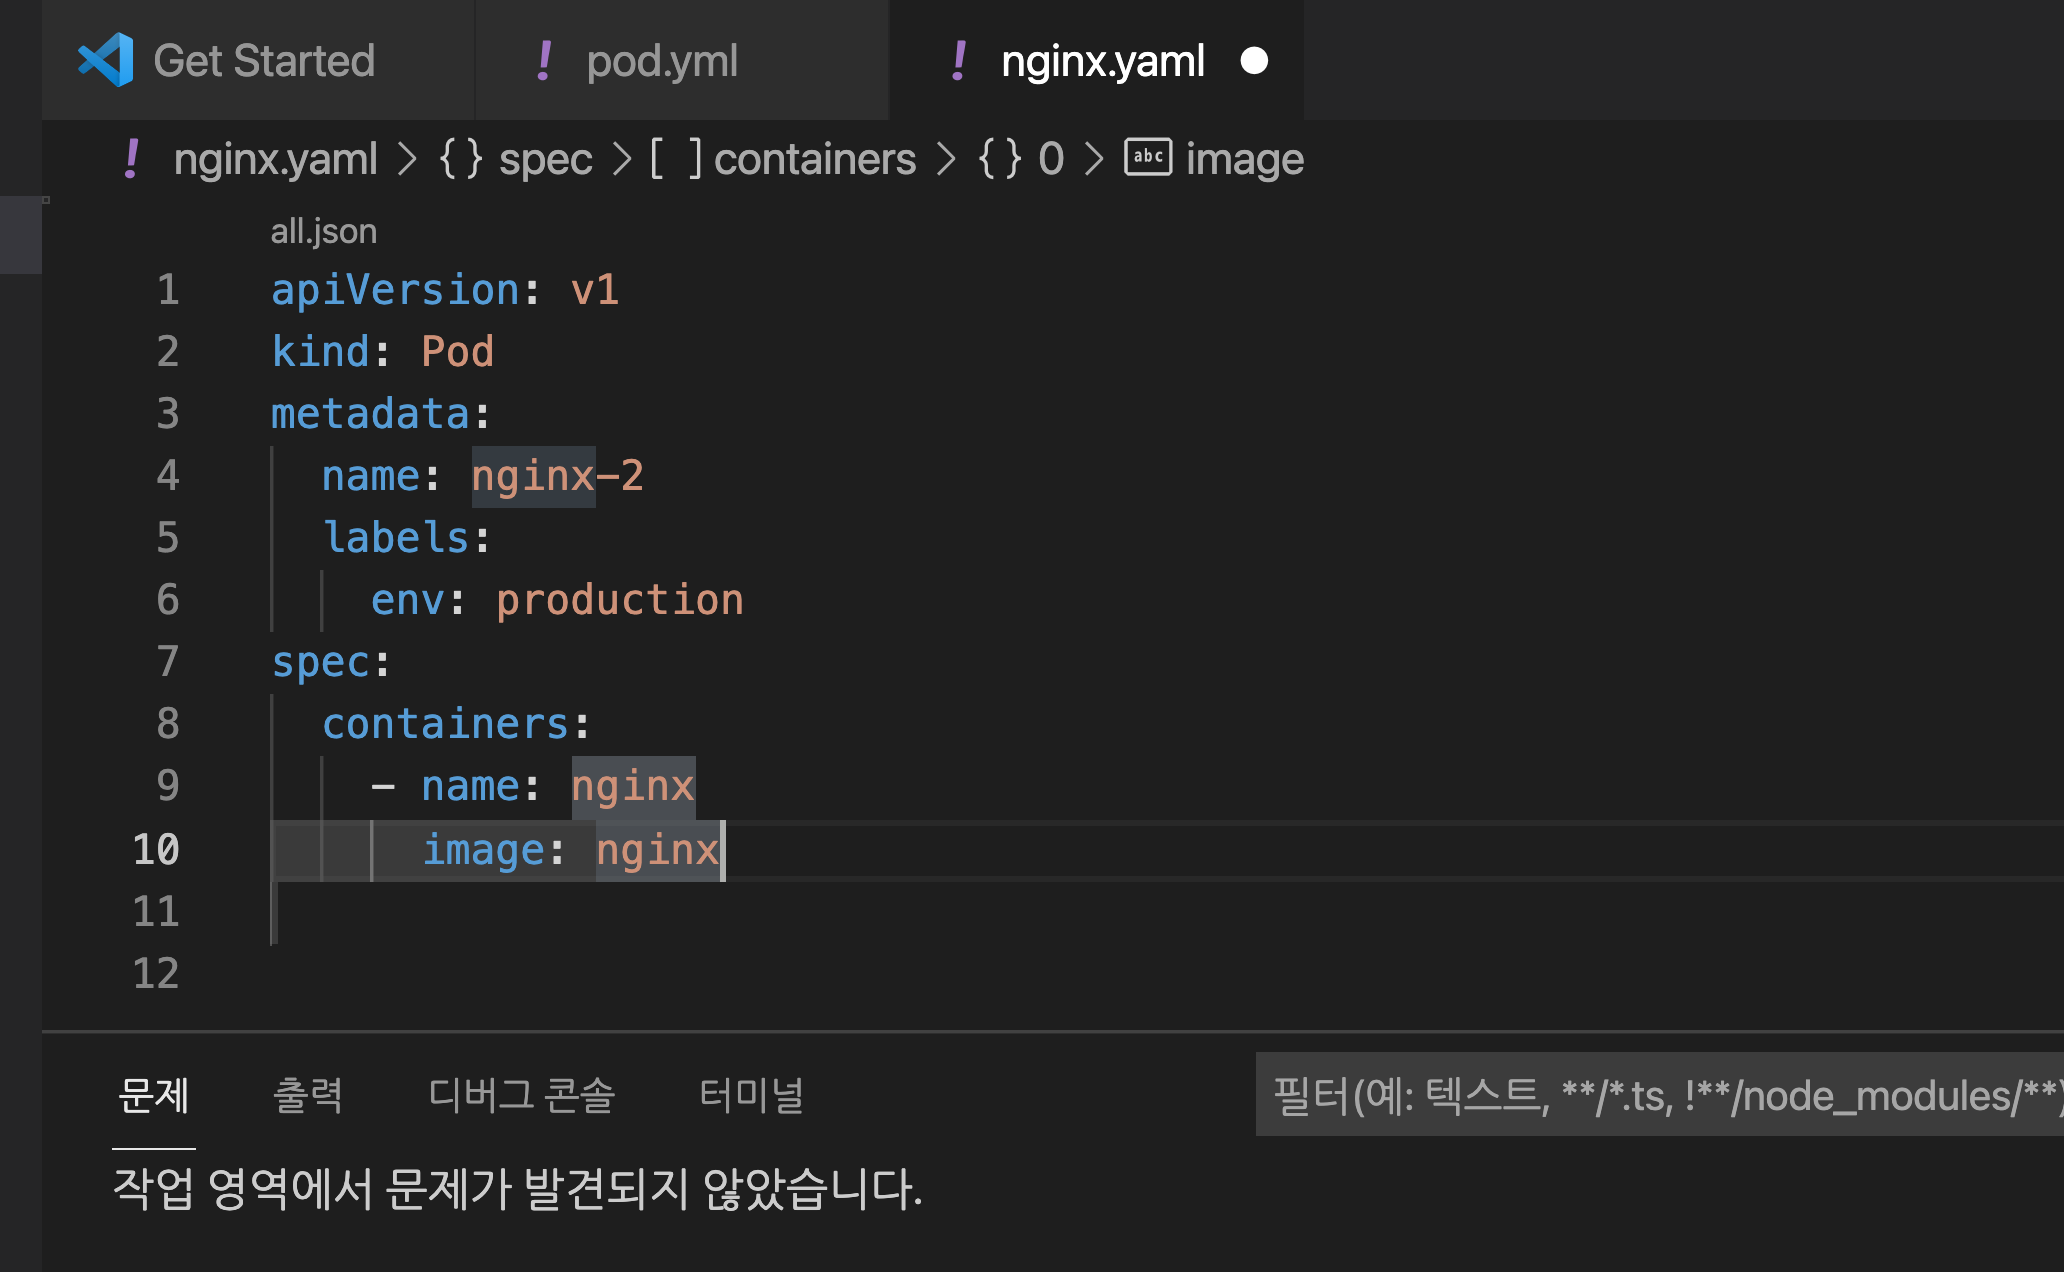
들여쓰기 에러를 바로잡아 주니 에러 메시지가 사라졌습니다. :-)
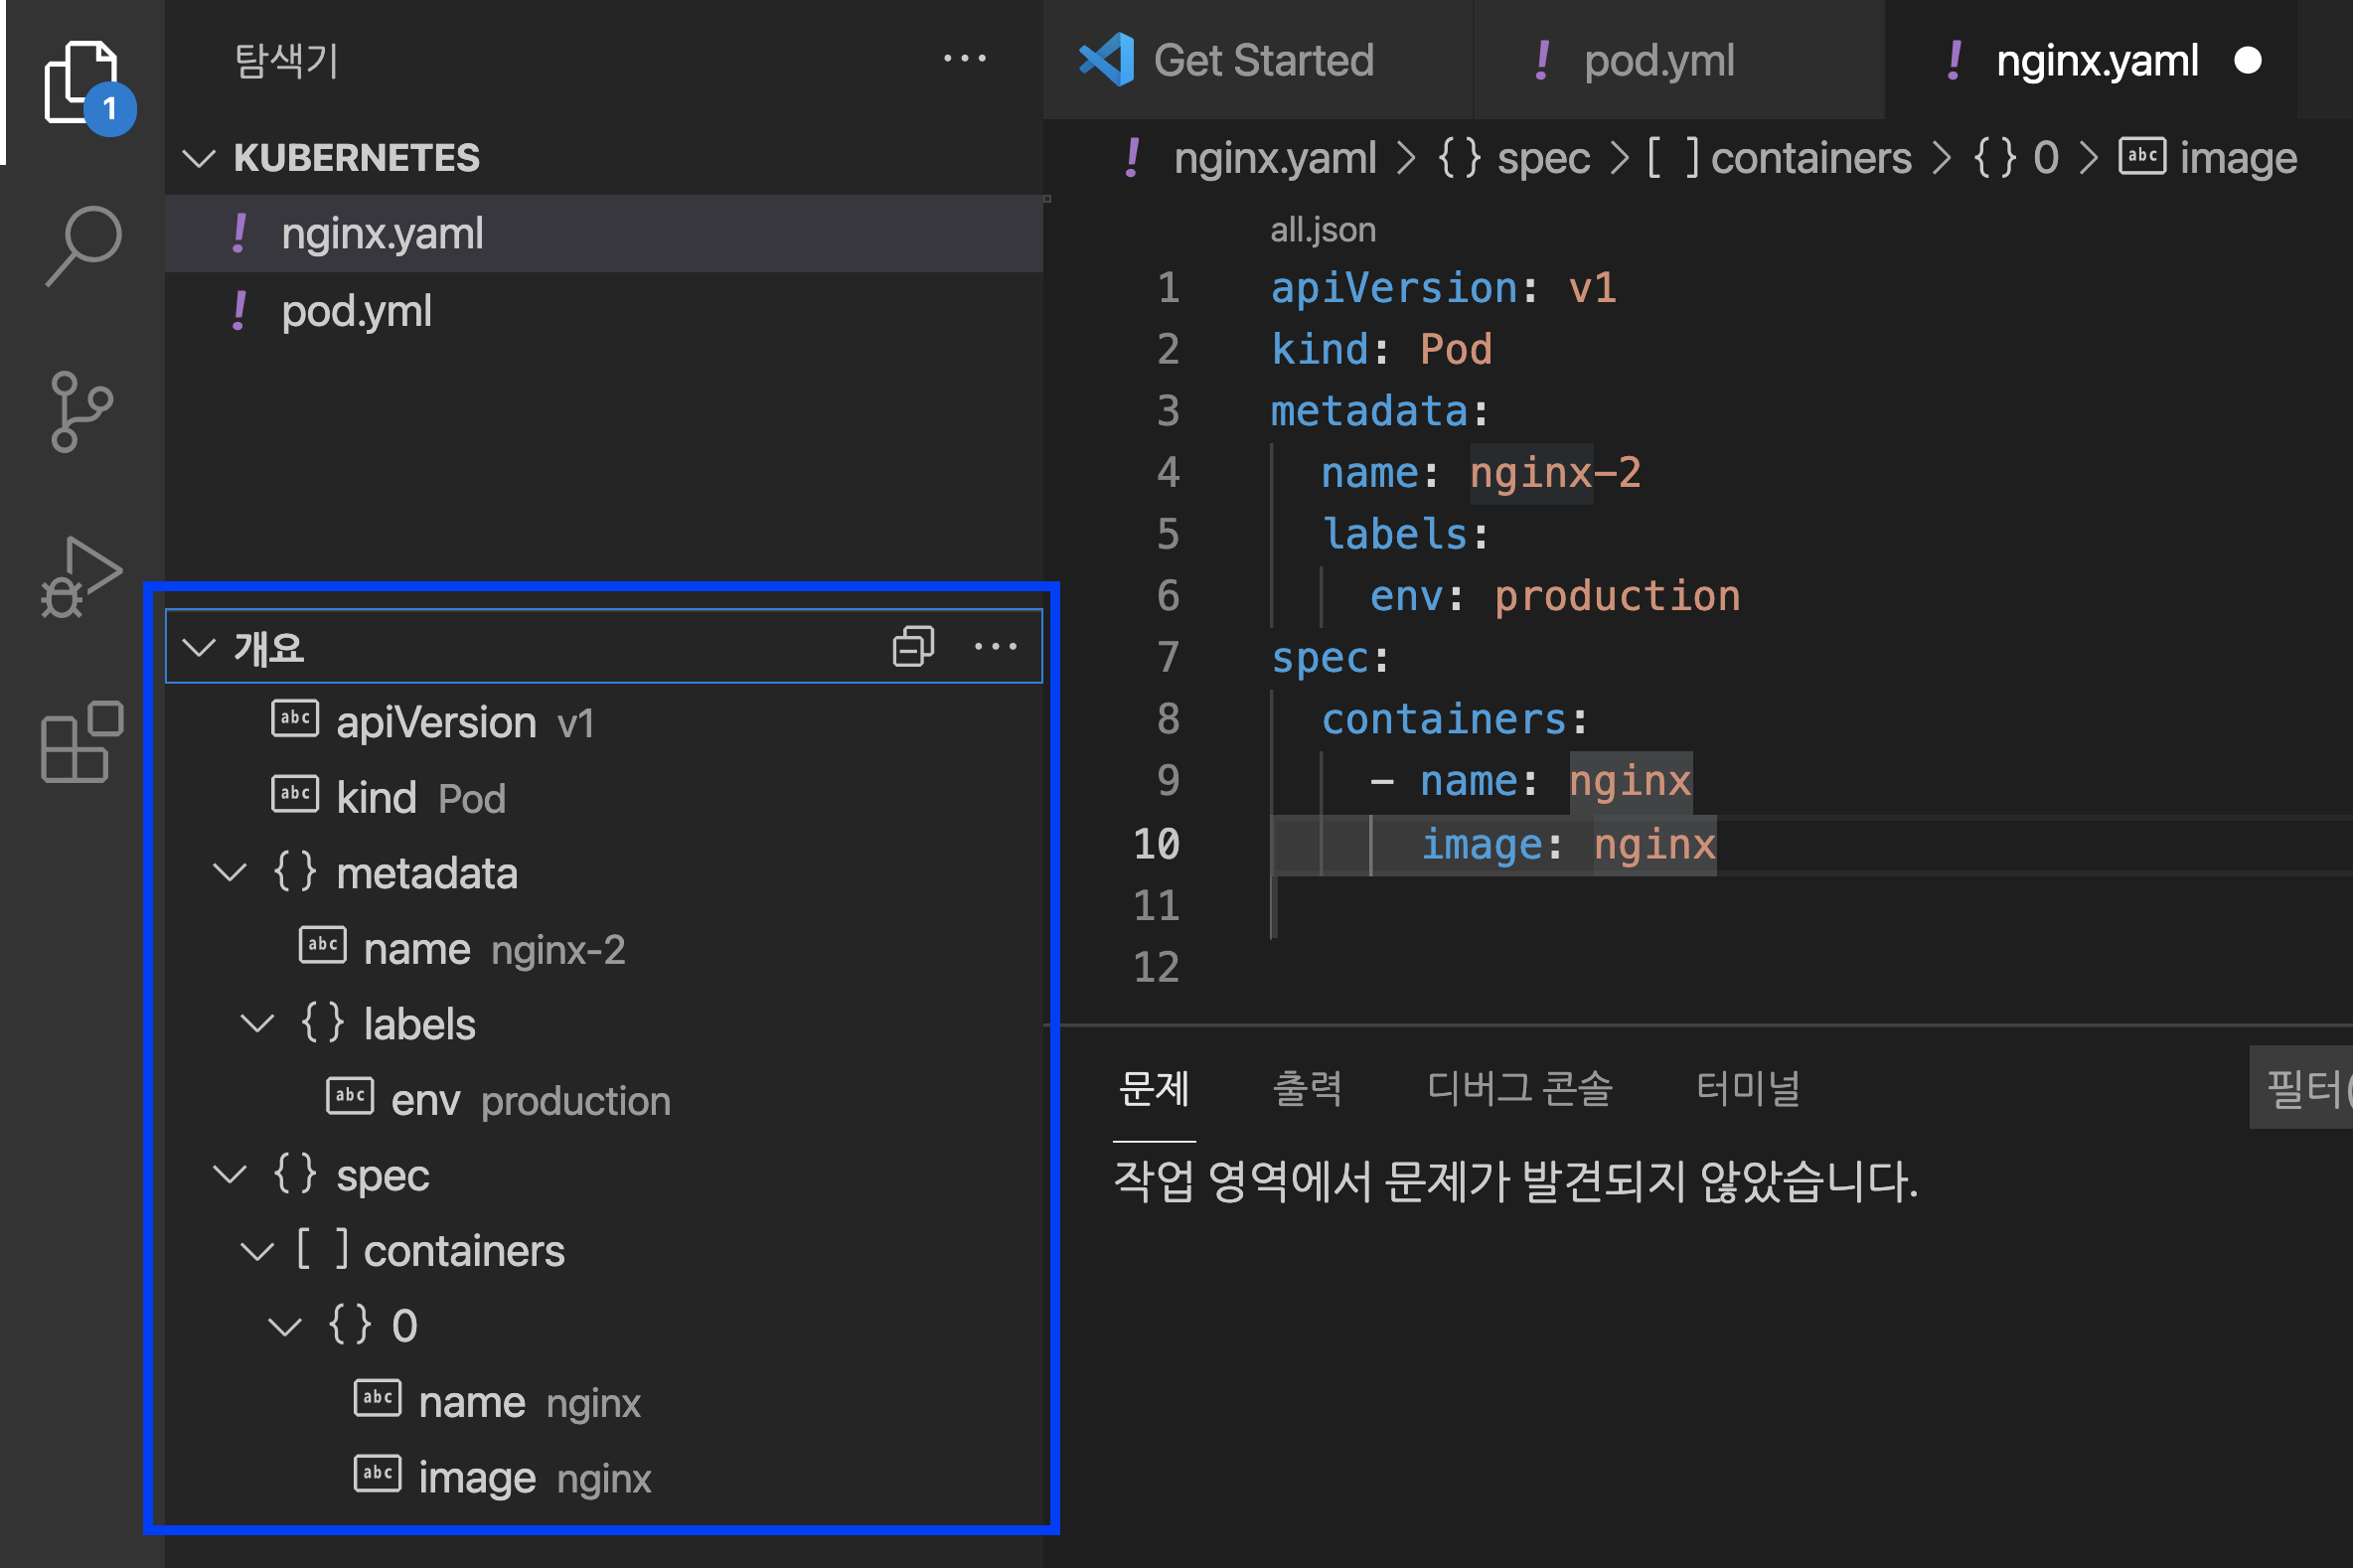
Visual Studio Code 의 왼쪽 하단에 '개요 (Outline)' 메뉴를 선택하면 아래와 같이 YAML 파일의 전체 구조(structure)를 한눈에 빠르게 살펴볼 수 있습니다.
터미널에서 방금 전에 새로 만든 nginx.yaml 파일을 cat 으로 열어서 살펴보면 아래와 같습니다. 물론 터미널에서 vim 에디터로도 YAML 파일을 만들고 수정할 수 있기는 합니다만, Visual Studio Code 의 편리한 기능들을 생각하면 역시 VS Code IDE 가 훨씬 매력적이긴 합니다.
(base) lhongdon@Hongui-MacBookPro ~ % ls
Applications		Downloads		Music			VirtualBox VMs		minikf			seaborn-data
Desktop			Library			Pictures		examples		minikf-kubeconfig
Documents		Movies			Public			kubernetes		opt
(base) lhongdon@Hongui-MacBookPro ~ % cd kubernetes
(base) lhongdon@Hongui-MacBookPro kubernetes % ls
nginx.yaml	pod.yml
(base) lhongdon@Hongui-MacBookPro kubernetes %
(base) lhongdon@Hongui-MacBookPro kubernetes %
(base) lhongdon@Hongui-MacBookPro kubernetes % cat nginx.yaml
apiVersion: v1
kind: Pod
metadata:
  name: nginx-2
  labels:
    env: production
spec:
  containers:
    - name: nginx
      image: nginx
                                                                                                                                                             (base) lhongdon@Hongui-MacBookPro kubernetes %
이번 포스팅이 많은 도움이 되었기를 바랍니다.
행복한 데이터 과학자 되세요~! :-)

'Kubeflow' 카테고리의 다른 글
| [Docker] 컨테이너, 도커 컨테이너, 도커 이미지 (Dontainer, Docker Container, Docker Image) (0) | 2022.03.20 |
|---|---|
| [Kubeflow] 파이프라인 개념과 구성요소 개요 (Conceptual overview of Kubeflow Pipelines) (0) | 2021.09.26 |
| [Kubeflow] K8s 툴인 kubectl 설치하고 사용하기 (0) | 2021.09.13 |
| [Kubeflow] MiniKF 를 맥북에 설치하기 (Installing MiniKF, Mini-Kubuflow on laptop/desktop) (0) | 2021.08.17 |
| Kubeflow 는 무엇인가요? (What is Kubeflow?) (0) | 2021.08.12 |


 vegetables.yml


